
Hey there, foodies and Desperate Housewives fans! Are you ready to dive into the delicious world of the Desperate Housewives Recipes? Because I am! I mean, who wouldn’t want to try out some mouthwatering dishes inspired by the drama and intrigue of Wisteria Lane? Trust me, it’s a culinary adventure you won’t want to miss!

On Wisteria Lane, something is always cooking up, which brings me to the following article on dishes from the Desperate Homemaker’s Show.
This American drama series entertained thousands around the world! Having had up to 8 seasons, it has been through all the plots and stories.

Now, let’s talk about favourites. I’ve got to say that narrowing down the best recipe from this fabulous collection is like choosing a favourite homemaker—nearly impossible!
But if I had to pick, the Scavo Family Mini Chicken Pizzas and Gabrielle’s Low-Fat Beef Enchiladas stand out. The mini pizzas are perfect for a fun family night, while the low-fat enchiladas let you indulge without the guilt. It’s a tough choice, but you’ll be in for a treat either way!
But hey, why stop there? You have an entire menu at your disposal—dishes such as Lynette’s Mother’s Day French Toast Waffles and Katherine’s Modern Waldorf Salad.
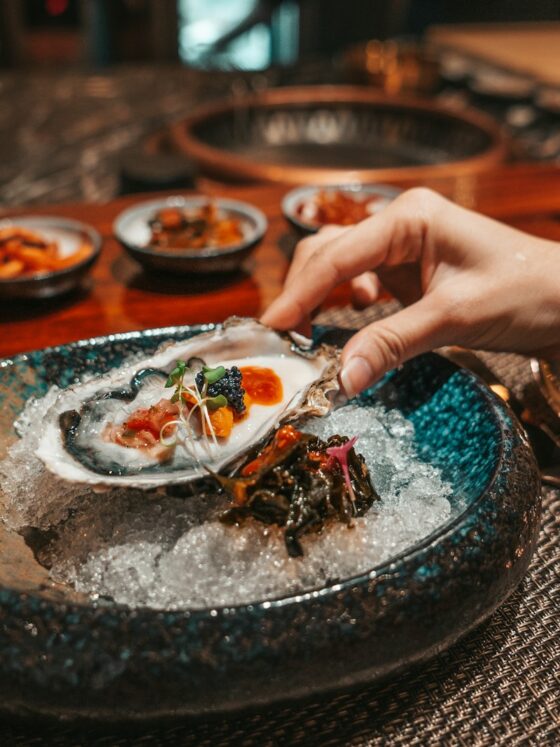
Breakfast, lunch, and dinner—these recipes have you covered. And let’s not forget about those tempting orange blossom muffins or the mouthwatering maple-glazed salmon with pineapple. It’s a feast fit for the ladies of Wisteria Lane!
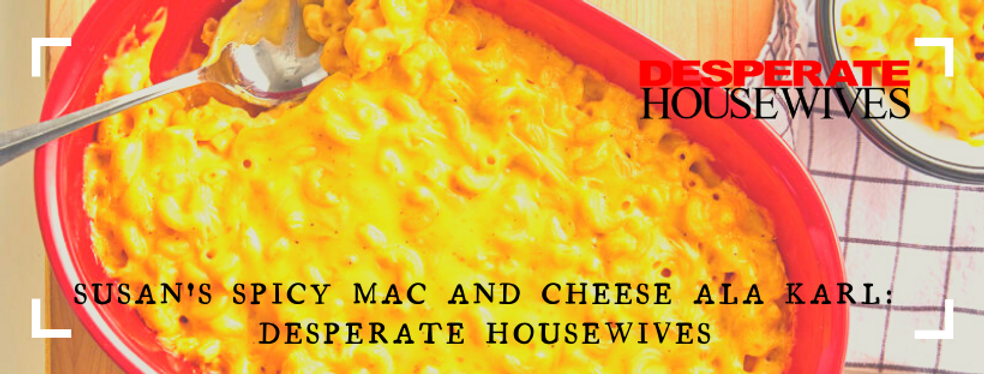
Susan’s Spicy Mac and Cheese Ala Karl:
| Ingredients | Amount |
|---|---|
| Finely chopped onion | 1 1/2 cups |
| Large garlic cloves, minced | 2 |
| One teaspoon | 1 1/2 tablespoons |
| Ground coriander | One can (28 ounces) |
| Ground cumin | 1 1/2 teaspoons |
| Unsalted butter | 1/2 stick (1/4 cup) |
| All-purpose flour | 1/4 cup |
| Milk | 4 cups |
| Plum tomatoes, chopped and drained well | 1 can (28 ounces) |
| Cayenne pepper, to taste (if desired) | As needed |
| Elbow macaroni | 1 pound |
| Coarsely grated Monterey Jack cheese | 1 1/2 cups (about 6 ounces) |
| Coarsely grated extra-sharp Cheddar cheese | 1 1/2 cups (about 6 ounces) |
| Fresh bread crumbs | 1 1/2 cups |
| Freshly grated Parmesan cheese | 1 1/3 cups (about 1/4 pound) |
Here are the directions to make Susan’s Spicy Mac and Cheese Ala Karl:
- Cook the Pasta:
- Cook the elbow macaroni or pasta according to the package instructions until al dente. Drain and set aside.
- Preheat the oven:
- Preheat your oven to 350°F (175°C). Grease a 9×13-inch baking dish.
- Prepare the cheese sauce:
- In a medium saucepan over medium heat, melt 1/4 cup of butter. Add the flour and whisk continuously for about 1-2 minutes until it forms a smooth paste (roux).
- Gradually pour in the milk while whisking to prevent lumps. Continue to cook and whisk until the mixture thickens, about 5-7 minutes.
- Reduce the heat to low and stir in the shredded cheddar cheese, Monterey Jack cheese, grated Parmesan cheese, salt, black pepper, smoked paprika, cayenne pepper, chilli powder, crushed red pepper flakes, and garlic powder. Stir until the cheese is fully melted and the sauce is smooth.
- Combine Pasta and Cheese Sauce:
- Add the cooked pasta to the cheese sauce and stir to coat the pasta evenly with the spicy cheese sauce.
- Prepare the topping:
- In a small bowl, mix the breadcrumbs with the melted butter.
- Assemble and bake
- Transfer the mac and cheese mixture to the greased baking dish.
- Sprinkle the breadcrumb topping evenly over the mac and cheese.
- Bake:
- Bake in the preheated oven for about 20-25 minutes or until the top is golden brown and the cheese sauce is bubbling.
- Garnish and Serve:
- If desired, garnish with chopped fresh parsley before serving.
Note: This recipe is a flavourful twist on classic mac and cheese with a spicy kick.
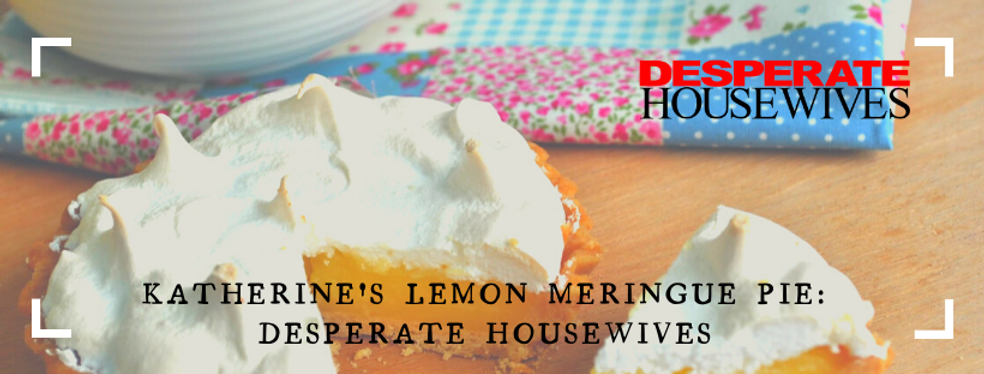
Katherine’s Lemon Meringue Pie
| For the Pie Crust: | For the Lemon Filling: | For the Meringue Topping: |
|---|---|---|
| 1 1/4 cups all-purpose flour | 1 cup granulated sugar | 4 large eggs, beaten |
| 1/2 teaspoon salt | 3 tablespoons cornstarch | 1/4 teaspoon cream of tartar |
| 1/2 cup unsalted butter, cold and cubed | 1/4 teaspoon salt | 1/2 cup granulated sugar |
| 3-4 tablespoons ice water | 1 1/2 cups water | 1/2 teaspoon vanilla extract |
| 4 large egg yolks, beaten | ||
| 2 teaspoons lemon zest | ||
| 1/2 cup freshly squeezed lemon juice (about 3-4 lemons) | ||
| 2 tablespoons unsalted butter |
Here are the directions to make Katherine’s Lemon Meringue Pie:
Prepare the pie filling:
- Whisk together the granulated sugar, cornflour, and salt in a medium saucepan.
- Gradually add the water while whisking continuously to avoid lumps.
- Place the saucepan over medium heat and cook, stirring constantly, until the mixture thickens and comes to a boil. This should take about 5-7 minutes.
- In a separate bowl, whisk the egg yolks. Gradually add about half the hot sugar mixture to the egg yolks, whisking constantly to temper the yolks.
- Return the egg yolk mixture to the saucepan with the remaining sugar mixture. Cook for an additional 2 minutes, stirring continuously.
- Remove the saucepan from the heat and stir in the unsalted butter until it’s fully melted.
- Add the finely grated lemon zest and fresh lemon juice to the mixture. Stir until well combined.
- Pour the lemon filling into the pre-baked pie crust, spreading it evenly.
Prepare the Meringue Topping:
- In a clean, dry mixing bowl, beat the egg whites and cream of tartar on high speed until soft peaks form.
- Gradually add the granulated sugar while continuing to beat. Beat until stiff, glossy peaks form.
- Stir in the vanilla extract.
Assemble and bake
- Preheat your oven to 350°F (175°C).
- Spoon the mixture over the lemon filling in the pie crust, spreading it to the edges to seal the pie.
- Create decorative peaks or swirls with a spatula or the back of a spoon.
- Place the pie in the oven and bake for about 12–15 minutes or until the meringue is lightly browned.
Chill and Serve:
- Remove the pie from the oven and let it cool to room temperature.
- Once cooled, refrigerate the pie for at least 2 hours before serving to allow the filling to set.
- Slice and serve your delicious Katherine’s Lemon Meringue Pie as a delightful dessert!
Note: Enjoy Katherine’s delicious lemon meringue pie as a refreshing and tangy dessert!
Lynette’s Mother’s Day French Toast Waffles

| Ingredients | Amount |
|---|---|
| Pancake/waffle mix | 1 cup |
| White sugar | 2 teaspoons |
| Ground cinnamon | 1 teaspoon |
| Cold milk | 1/2 cup |
| Eggs | 2 |
| Vanilla extract | 1 teaspoon |
Here are the directions to make the dish:
- Preheat the waffle iron.
- Preheat your waffle iron according to the manufacturer’s instructions.
- Prepare the egg mixture:
- Whisk together the eggs, whole milk, vanilla extract, ground cinnamon, and salt until well combined in a shallow dish or a bowl.
- Dip the bread:
- Dip a slice of thick bread into the egg mixture, ensuring both sides are coated evenly. Allow any excess mixture to drip off.
- Cook the French Toast Waffles:
- Place the dipped bread slice onto the preheated waffle iron.
- Close the waffle iron and cook until the French toast waffle is golden brown and crisp. The cooking time may vary depending on your waffle iron, but it typically takes 3-5 minutes.
- Repeat this process with the remaining slices of bread.
- Keep Warm:
- Place the cooked French toast waffles on a baking sheet and keep them warm in a 200°F (93°C) oven while you finish cooking the others.
- Serve:
- Serve the French toast waffles on individual plates.
- Top with fresh berries, sliced bananas (if using), chopped nuts, a dusting of powdered sugar, and a drizzle of maple syrup.
- For an extra special touch, add a dollop of whipped cream.
Note: If desired, you can also customise the waffles by adding additional flavours such as chopped nuts, chocolate chips, or sliced bananas to the batter before cooking.
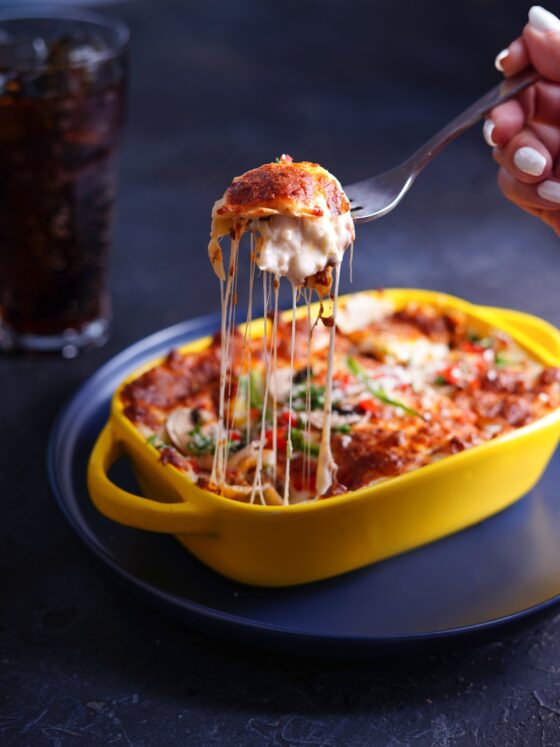
Edie’s Quick And Easy No-Fail Lasagna

| Ingredients | Amount |
|---|---|
| Lasagna noodles | 1 lb |
| Lean ground beef or lean ground turkey | 2 lbs |
| Spaghetti sauce | 1 (32 ounce) jar |
| Pizza sauce | 1 (15 ounce) can |
| Ricotta cheese | 4 cups |
| Shredded mozzarella cheese, divided | 4 cups |
| Shredded cheddar cheese | 2 cups |
| Parmesan cheese | 1/4 cup |
| Eggs | 2 |
| Parsley | 1 tablespoon |
| Basil | 1 teaspoon |
| Oregano | 2 teaspoons |
| Pepper | 1/4 teaspoon |
Here are the directions to make the lasagna:
- Preheat the Oven: Preheat your oven to 350°F (175°C).
- Cook the lasagna noodles: Bring a large pot of salted water to a boil. Cook the lasagna noodles according to the package instructions until they are al dente (usually about 8-10 minutes). Drain, rinse with cold water, and set aside.
- Prepare the meat sauce:
- In a large skillet or saucepan, cook the ground beef (or Italian sausage) over medium-high heat until it’s browned and no longer pink. Break it apart with a spoon as it cooks.
- Add the chopped onion and minced garlic to the meat and cook for an additional 2-3 minutes until the onion is translucent.
- Stir in the jar of marinara sauce, dried basil, dried oregano, salt, and black pepper. Simmer the sauce for about 10 minutes, allowing the flavours to meld.
- Prepare the cheese mixture:
- In a mixing bowl, combine the ricotta cheese, 1 1/2 cups of shredded mozzarella cheese, grated Parmesan cheese, egg, and a pinch of salt and black pepper. Mix until well combined.
- Assemble the Lasagna:
- In a 9×13-inch (23×33 cm) baking dish, spread a small amount of the meat sauce to coat the bottom.
- Place 3 lasagna noodles side by side over the sauce.
- Spread a portion of the cheese mixture evenly over the noodles.
- Repeat the layers: meat sauce, noodles, cheese mixture, until you have used all the ingredients. Make sure to finish with a layer of meat sauce on top.
- Bake:
- Sprinkle the remaining 1/2 cup of shredded mozzarella cheese over the top.
- Cover and bake:
- Cover the baking dish with aluminium foil.
- Bake:
- Bake in the preheated oven for 30 minutes.
- Uncover and Bake Further:
- Remove the foil and bake for an additional 10-15 minutes, or until the lasagna is bubbly and the cheese on top is golden brown.
- Rest and Serve:
- Let the lasagna rest for a few minutes before slicing.
- Garnish with fresh basil leaves or parsley if desired.
Note: You can also let the lasagna cool completely, then refrigerate it overnight to allow the flavours to develop further. Reheat individual portions in the oven or microwave as desired.
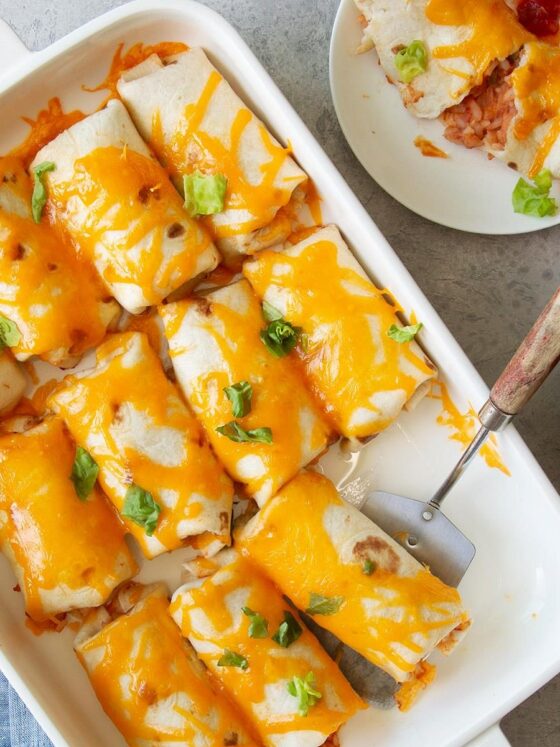
Gabrielle’s Low-Fat Beef Enchiladas

| Ingredients | Amount |
|---|---|
| Lean ground beef | 1 pound |
| Medium onion, chopped | 1 (1/2 cup) |
| Sour cream | 1/2 cup |
| Shredded cheddar cheese | 1 cup (4 ounces) |
| Pepper | 1/4 teaspoon |
| Green bell pepper, chopped | 1/3 cup |
| Water | 2/3 cup |
| Cumin | 1 tablespoon |
| Garlic, finely chopped | 1 clove |
| Tomato sauce | 1 can (15 ounces) |
| Flour tortillas | 8 |
| Shredded cheese, sour cream, and chopped onions (optional) | as desired |
Here are the directions to make the dish:
- Preheat the Oven: Preheat your oven to 375°F (190°C).
- Prepare the filling:
- Over medium heat, cook the lean ground beef (or turkey) in a large skillet until browned. Break it apart with a spoon as it cooks.
- Add the chopped onion, minced garlic, and diced bell pepper to the skillet. Cook for another 2-3 minutes until the vegetables are softened.
- Stir in the black beans, corn kernels, salsa, chilli powder, ground cumin, salt, and black pepper. Simmer for about 5 minutes, allowing the flavours to meld. Remove from heat.
- Prepare the Enchilada Sauce:
- In a separate saucepan, combine the tomato sauce, chilli powder, ground cumin, garlic powder, salt, and black pepper. Heat over low-medium heat, stirring occasionally, until the sauce is heated through.
- Assemble the Enchiladas:
- Spoon a portion of the filling mixture onto each tortilla. Sprinkle with a bit of shredded cheddar cheese.
- Roll and place in a baking dish:
- Roll up each tortilla tightly around the filling, placing them seam-side down in a 9×13-inch (23×33 cm) baking dish.
- Pour sauce and top with cheese.
- Pour the enchilada sauce evenly over the rolled tortillas.
- Sprinkle the remaining shredded cheddar cheese over the top.
- Bake:
- Place the baking dish in the preheated oven and bake for about 20–25 minutes, or until the cheese is melted and bubbly.
- Garnish and Serve:
- Remove the enchiladas from the oven and let them cool slightly before serving.
- Garnish with chopped fresh cilantro if desired.
Note: Enjoy Gabrielle’s delicious and healthier version of beef enchiladas!
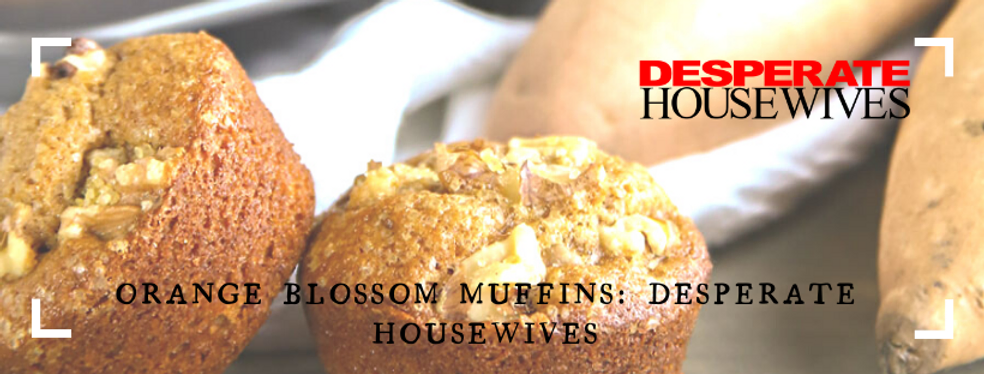
Orange Blossom Muffins
| For the Muffins: | For the Orange Blossom Glaze (Optional): |
|---|---|
| 2 cups all-purpose flour | 1 cup powdered sugar |
| 1/2 cup granulated sugar | 2-3 tablespoons freshly squeezed orange juice |
| 2 teaspoons baking powder | 1/2 teaspoon orange blossom water |
| 1/2 teaspoon baking soda | |
| 1/4 teaspoon salt | |
| Zest of 2 oranges | |
| 1/2 cup unsalted butter, melted and cooled | |
| 2/3 cup freshly squeezed orange juice (from about 2-3 oranges) | |
| 2 large eggs | |
| 1 teaspoon vanilla extract | |
| 1 teaspoon orange blossom water (adjust to taste) | |
| 1/2 cup plain Greek yogurt or sour cream |
Here are the directions to make Orange Blossom Muffins:
- Preheat the Oven: Preheat your oven to 375°F (190°C). Line a muffin tin with paper liners or grease the muffin cups.
- Mix Dry Ingredients: In a large mixing bowl, whisk together the all-purpose flour, granulated sugar, baking powder, baking soda, salt, and the zest of 2 oranges.
- Combine Wet Ingredients: In another bowl, combine the melted and cooled butter, freshly squeezed orange juice, eggs, vanilla extract, orange blossom water, and Greek yoghurt (or sour cream). Mix until well combined.
- Combine Wet and Dry Ingredients: Pour the wet ingredients into the dry ingredients. Stir until just combined. Be careful not to overmix; it’s okay if the batter has a few lumps.
- Fill Muffin Cups: Spoon the muffin batter into the prepared muffin cups, filling each about 2/3 full.
- Bake: Place the muffin tin in the preheated oven and bake for about 18-20 minutes or until a toothpick inserted into the centre of a muffin comes out clean, with perhaps a few moist crumbs attached.
- Cool: Allow the muffins to cool in the tin for a few minutes, then transfer them to a wire rack to cool completely.
- Prepare the Orange Blossom Glaze (Optional): In a small bowl, whisk together the powdered sugar, freshly squeezed orange juice, and orange blossom water until you have a smooth glaze. Adjust the consistency by adding more juice if needed.
- Glaze the Muffins: Once the muffins have cooled, drizzle the orange blossom glaze over the top of each muffin.
- Serve: Serve your homemade orange blossom muffins with a cup of tea or coffee and enjoy the citrussy, floral flavours!
Note: Enjoy the delicious and citrussy flavour of the Orange Blossom Muffins!
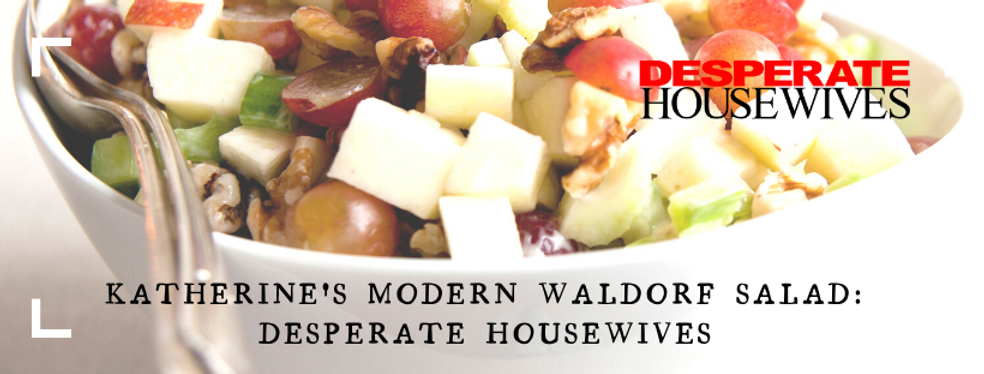
Katherine’s Modern Waldorf Salad
| Ingredients | Amount |
|---|---|
| Low-fat mayonnaise | 1/4 cup |
| Pine nuts toasted | 1/4 cup |
| Orange juice | 2 tablespoons |
| Grated orange peel | 2 teaspoons |
| Cajun seasoning | 1/2 teaspoon |
| Romaine lettuce | 1 head |
| Grapefruit | 1 |
| Bosc pear, firm but ripe | 1 |
| Tart green apple | 1 |
| Seedless grapes | 1 cup |
| Chopped dates | 1/3 cup |
| Pine nuts, toasted | 1/4 cup |
Here are the directions to make Katherine’s Modern Waldorf Salad:
- Prepare the dressing:
- In a small bowl, whisk together the plain Greek yoghurt (or mayonnaise), honey, freshly squeezed lemon juice, Dijon mustard, salt, and just ground black pepper. Adjust the sweetness and tartness to your liking by adding more honey or lemon juice if necessary.
- Assemble the salad
- In a large salad bowl, arrange the mixed salad greens as the base for your salad.
- Add the ingredients:
- Scatter the diced apples, halved grapes, thinly sliced celery, toasted and chopped walnuts, dried cranberries (or raisins), and red onion (if using) over the salad greens.
- Toss and Dress:
- Drizzle the dressing over the salad ingredients.
- Gently toss everything together to ensure the dressing coats all the ingredients evenly.
- Optional Cheese:
- If desired, sprinkle crumbled blue cheese or goat cheese over the top of the salad.
- Serve:
- Serve Katherine’s modern Waldorf salad immediately as a side dish or add grilled chicken or shrimp to make it a complete meal.
Note: If desired, add toppings such as grilled chicken, crumbled goat cheese, or sliced almonds. Feel free to adjust the seasonings and ingredients to your taste preferences.
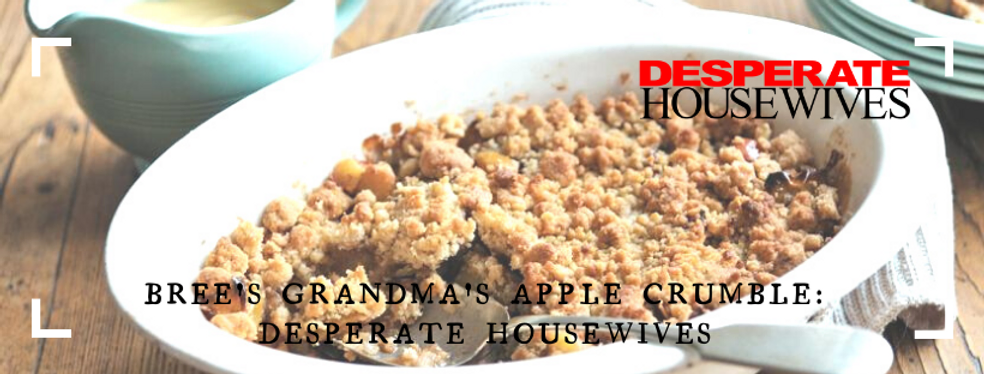
Bree’s Grandma’s Apple Crumble
| Ingredients | Amount |
|---|---|
| Med. apples, pared and cored | 5 (about 2 1/4 lbs.) |
| Lemon juice | 3 tbsp. |
| Sugar | 1/2 cup |
| All-purpose flour | 2 tbsp. |
| Grated lemon peel | 1 tsp. |
| Unbaked (9-inch) pie shell | 1 |
| Crumble topping | 1 recipe |
Here are the directions to make the dish:
- Preheat your oven: Preheat your oven to 350°F (175°C).
- Prepare the filling:
- In a large mixing bowl, combine the sliced apples, granulated sugar, ground cinnamon, ground nutmeg (if using), lemon juice, and 1 tablespoon of all-purpose flour. Toss the mixture until the apples are evenly coated.
- Prepare the Crumble Topping:
- In a separate bowl, prepare the crumble topping. Combine the rolled oats, all-purpose flour, brown sugar, and ground cinnamon. Mix well.
- Add the cold, cubed butter to the oat mixture. Using a pastry cutter or your fingers, work the butter into the dry ingredients until the mixture resembles coarse crumbs. You can also use a food processor with a few pulses to achieve this texture.
- Assemble the Crumble:
- Transfer the apple mixture to a greased 9×9-inch (23×23 cm) baking dish or a similar-sized ovenproof dish.
- Sprinkle the crumble topping evenly over the apple filling.
- Bake the Crumble:
- Cover the baking dish with aluminium foil and bake for about 30 minutes.
- Uncover and Bake Further:
- Remove the foil and continue to bake for an additional 20–25 minutes, or until the crumble topping is golden brown and the apple filling is bubbling.
- Cool and Serve:
- Remove the apple crumble from the oven and let it cool for a few minutes before serving.
- Serve Warm:
- Serve Bree’s Grandma’s Apple Crumble warm on its own or with a scoop of vanilla ice cream or a dollop of whipped cream for an extra treat.
Note: Enjoy the delicious apple pie with crumble topping! Serve it warm or at room temperature, and optionally, with a scoop of vanilla ice cream or a dollop of whipped cream.
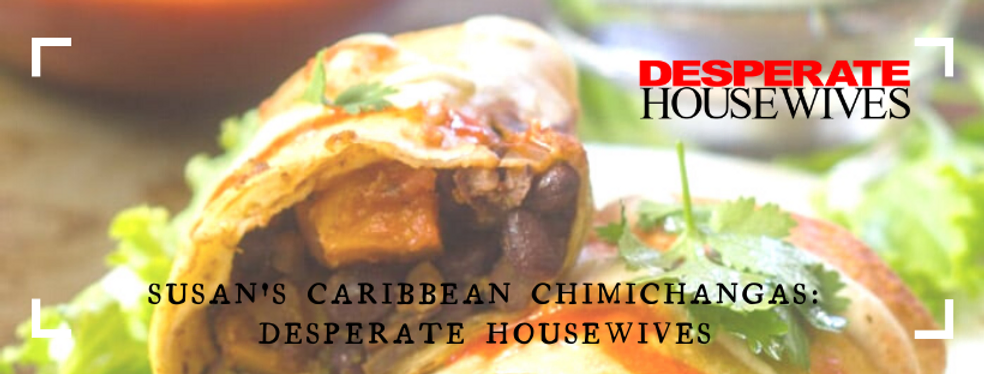
Susan’s Caribbean Chimichangas
| Ingredients | Amount |
|---|---|
| Chicken breast halves, cooked | 4 |
| Black beans, drained, rinsed | 1 can (15 ounces) |
| Red onions, diced | 1/2 cup |
| Frozen corn, thawed, drained | 1 cup |
| Fresh cilantro, diced | 1/4 cup |
| Jalapeno peppers, seeded, diced | 2 |
| Cooked rice, cooled | 1 cup |
| Jamaican jerk seasoning | 1 tablespoon |
| Flour tortillas, large (burrito size) | 12 |
| Mango juice | 2 cups |
| Minced cilantro | 3 tablespoons |
| Hot pepper sauce | 2 teaspoons |
| Brown sugar | 2 tablespoons |
| Jamaican jerk seasoning | 2 teaspoons |
Here are the directions to make the dish:
- Prepare the filling:
- In a large mixing bowl, combine the cooked and shredded chicken with black beans, cooked rice, diced mango, pineapple, red bell pepper, chopped cilantro, Caribbean jerk seasoning, salt, and black pepper. Toss everything together until well mixed.
- Assemble the chimichangas:
- Lay out a tortilla on a clean surface.
- Place a generous portion of the chicken and fruit mixture in the centre of the tortilla.
- Sprinkle shredded cheese over the filling.
- Fold and roll:
- Fold the sides of the tortilla inwards and then roll it up from the bottom to create a secure package.
- Fry the Chimichangas:
- Heat about 2 inches of cooking oil in a deep skillet or frying pan to 350°F (175°C).
- Carefully place the chimichangas seam-side down in the hot oil and fry until they are golden brown and crispy, usually about 2-3 minutes per side.
- Drain and Serve:
- Remove the chimichangas from the oil and place them on a plate lined with paper towels to drain any excess oil.
- Serve:
- Serve the Caribbean-inspired chimichangas hot with sour cream, salsa, and lime wedges.
Note: Enjoy your homemade Susan’s Caribbean chimichangas, inspired by the flavours of the Caribbean and Susan’s culinary adventures on “Desperate Housewives”!
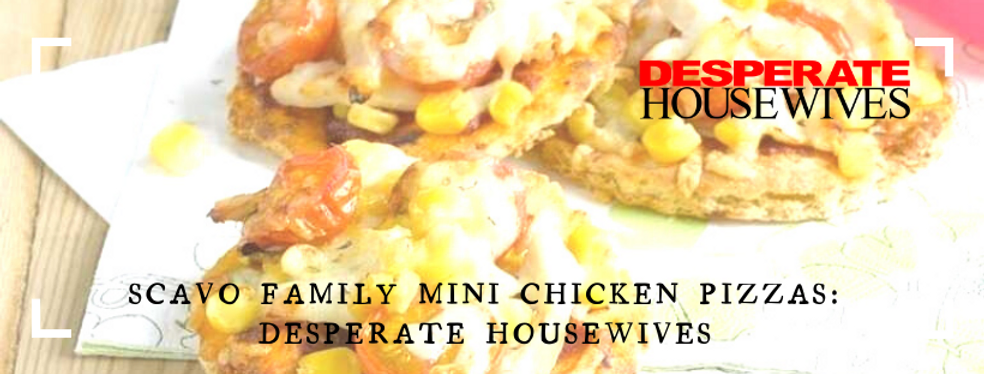
Scavo Family Mini Chicken Pizzas
| Ingredients | Amount |
|---|---|
| Pillsbury pizza crust in the tube (or ready-made pie crust) | As needed |
| Cooked chicken | 2 cups |
| Medium onion | 1 |
| Monterey Jack cheese | 1 lb. |
| Onion and chive cream cheese | As needed |
| Salt | To taste |
| Pepper | To taste |
Here are the directions to make Scavo Family Mini Chicken Pizzas
- Prepare the pizza dough (if making from scratch):
- In a small bowl, combine warm water and sugar. Sprinkle the yeast over the water and let it sit for about 5-10 minutes or until it becomes frothy.
- In a large mixing bowl, combine the flour and salt.
- Pour the yeast mixture and olive oil into the flour mixture. Stir until a dough forms.
- Turn the dough onto a floured surface and knead it for about 5 minutes or until it becomes smooth and elastic.
- Place the dough in a lightly oiled bowl, cover it with a clean kitchen towel, and let it rise for about 1 hour or until it doubles in size.
- Preheat your oven: Preheat your oven to 475°F (245°C) or as per the instructions for your pizza dough.
- Assemble the mini chicken pizzas:
- Divide the pizza dough into small portions, depending on how many mini pizzas you want.
- Roll out each portion of dough into a mini pizza crust.
- Top the Pizzas:
- Spread a layer of pizza sauce on each mini pizza crust.
- Sprinkle shredded mozzarella cheese on top of the sauce.
- Add the seasoned shredded chicken and your choice of diced bell peppers, red onion, black olives, and sliced mushrooms.
- Season and Bake:
- Sprinkle dried oregano, salt, and pepper over the assembled pizzas.
- Place the mini chicken pizzas on a baking sheet or pizza stone.
- Bake: Bake the mini pizzas in the oven for 10-12 minutes, or until the crust is golden and the cheese is bubbly and slightly browned.
- Serve: Remove the mini chicken pizzas from the oven and let them cool for a minute before slicing and serving.
Note: The Scavo family’s love of delicious homemade food on “Desperate Housewives” served as inspiration for these mini chicken pizzas, which are ideal for a family gathering or a fun weeknight dinner.
Angie’s Grandma’s Italian Pizzelle Cookies

| Ingredients | Amount |
|---|---|
| Eggs | 12 |
| Sugar | 2 cups |
| Vegetable oil | 1.5 cups |
| All-purpose flour | 6 cups |
| Baking powder | 2 tablespoons |
| Fennel seeds | 6 tablespoons |
| Optional: | |
| Unsweetened cocoa powder | 1/2 cup |
| Additional eggs | 2 |
| Amaretto | 1/2 cup |
| Additional all-purpose flour | 1/2 cup |
Note: A pizza iron is necessary to bake this recipe.
Here are the directions to make the pizzelle cookies:
- Preheat the pizzelle iron:
- Plug in and preheat your pizza iron according to the manufacturer’s instructions. Most pizzelle irons have an indicator light that will let you know when they are ready.
- Prepare the battery:
- In a mixing bowl, beat the eggs and sugar together until well combined and slightly fluffy.
- Add the butter and flavouring.
- Gradually add the melted butter and your choice of anise extract or vanilla extract to the egg and sugar mixture. Mix until well incorporated.
- Sift the dry ingredients:
- In a separate bowl, sift together the all-purpose flour and baking powder.
- Combine wet and dry ingredients:
- Gradually add the sifted dry ingredients to the egg mixture. Stir until you have a smooth batter. The batter should be thick enough to coat the back of a spoon. If it’s too thin, you can add a bit more flour.
- Cook the pizzelle:
- Lightly grease the heated pizza iron with a small amount of cooking spray or a brush of melted butter.
- Place a tablespoon of batter (or the amount recommended by your pizzelle iron’s instructions) onto the centre of each pizzelle mould.
- Close the iron and cook according to the manufacturer’s instructions, usually for about 30-45 seconds, until the pizzelles are lightly golden brown.
- Remove and shape the pizzelle.
- Carefully remove the pizzelles from the iron using a fork or a spatula and place them on a clean, flat surface while they are still hot.
- If you’d like to shape the pizzelle into cones or other forms, you can do so while they are still pliable and hot.
- Cool and Store:
- Let the pizza cool completely. They will harden as they cool.
- Store the pizzelle in an airtight container at room temperature for up to a week. They can also be frozen for longer storage.
Note: These pizzelle cookies are a classic Italian treat, and this recipe will help you create delicious, thin, and crisp cookies just like Angie’s grandma used to make.
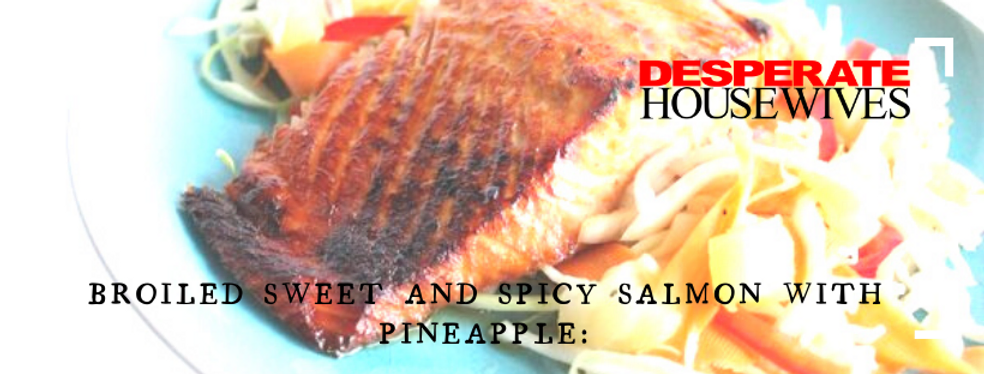
Broiled Sweet and Spicy Salmon with Pineapple
| Ingredients | Amount |
|---|---|
| Maple syrup | 1/4 cup |
| Cayenne pepper | 1/4 tsp |
| Salmon filet, cut into 4 pieces | 1 lb |
| Salt and pepper | To taste |
| Nonstick cooking spray | As needed |
| Pineapple (canned pineapple chunks can be used) | As desired |
| Cilantro, roughly chopped | As desired |
| Rice | As desired |
| Lime wedges (optional) | As desired |
Here are the directions to make the maple-glazed salmon with pineapple:
- Prepare the marinade:
- Whisk together the soy sauce, brown sugar, honey, minced garlic, grated ginger, and red pepper flakes in a bowl. This will be your sweet and spicy marinade.
- Marinate the Salmon:
- Place the salmon fillets in a shallow dish or a resealable plastic bag.
- Pour the marinade over the salmon, ensuring each fillet is well coated.
- Seal the bag (if using) or cover the dish with plastic wrap.
- Refrigerate the salmon and let it marinate for at least 30 minutes, but you can marinate it longer for enhanced flavour, even up to a few hours.
- Preheat the Broiler:
- Preheat your broiler to high. Place an oven rack about 6 inches below the broiler element.
- Prepare the pineapple:
- While the salmon is marinating, thread the fresh pineapple chunks onto skewers.
- Broil the salmon and pineapple.
- Line a baking sheet with aluminium foil and lightly grease it to prevent sticking.
- Remove the salmon fillets from the marinade and place them on the prepared baking sheet.
- Arrange the pineapple skewers alongside the salmon.
- Place the baking sheet under the broiler and cook for about 4-6 minutes on each side, or until the salmon is cooked to your preferred level of doneness and the pineapple chunks have caramelised slightly. Monitor it closely to prevent overcooking.
- Baste the salmon:
- While broiling, brush the salmon with some of the reserved marinade to keep it moist and flavourful.
- Garnish and Serve:
- Once done, remove the salmon and pineapple from the oven.
- Garnish the broiled salmon with fresh cilantro if desired.
- Serve the salmon and pineapple with lime wedges for added zing.
- Enjoy:
- Serve your broiled sweet and spicy salmon with pineapple hot and enjoy the delicious flavours reminiscent of a Desperate Housewives meal.
Note: This dish combines pineapple’s sweetness with the marinade’s spicy kick, creating a flavourful and memorable meal.
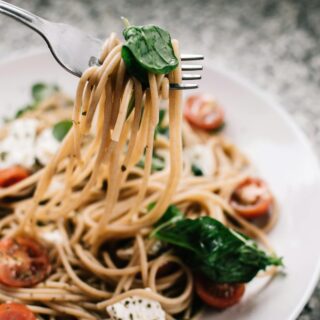
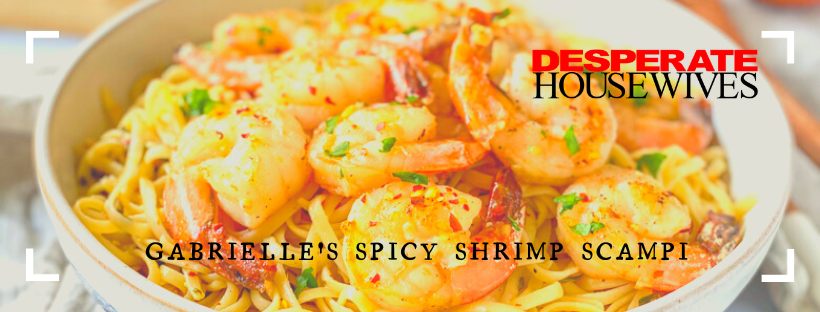
Gabrielle’s Spicy Shrimp Scampi
| Ingredients: | Quantity: |
|---|---|
| Large shrimp (peeled and deveined) | 1 pound |
| Linguine or spaghetti | 8 ounces |
| Unsalted butter | 3 tablespoons |
| Olive oil | 3 tablespoons |
| Garlic (minced) | 4 cloves |
| Red pepper flakes (adjust to your spice preference) | 1/2 teaspoon |
| Dry white wine (optional) | 1/2 cup (optional) |
| Lemon (juice) | Juice of 1 lemon |
| Lemon (zest) | Zest of 1 lemon |
| Fresh parsley (chopped) | 1/4 cup |
| Salt | To taste |
| Black pepper | To taste |
| Grated Parmesan cheese (optional) | For serving (optional) |
- Cook the Pasta:
- Cook the linguine or spaghetti in a large pot of salted boiling water according to the package instructions until al dente. Drain and set aside.
- Prepare the shrimp:
- Pat the shrimp dry with paper towels.
- Season the shrimp with salt and black pepper to taste.
- Cook the Shrimp:
- Heat the olive oil over medium-high heat in a large skillet or pan.
- Add the shrimp to the hot skillet in a single layer. Cook for 1-2 minutes on each side until they turn pink and opaque. Remove the shrimp from the skillet and set them aside.
- Make the Spicy Scampi Sauce:
- In the same skillet, add the minced garlic and red pepper flakes. Sauté for about 1 minute until fragrant.
- Deglaze the Pan:
- If using white wine, pour it into the skillet and let it simmer for a minute or two to reduce slightly, scraping any browned bits from the bottom of the pan.
- Add butter and lemon.
- Add the butter, lemon juice, and lemon zest to the skillet. Stir until the butter has melted and the sauce has come together. Season with additional salt and black pepper if needed.
- Combine shrimp and pasta:
- Return the cooked shrimp to the skillet and toss them in the sauce.
- Finish and garnish:
- Add the cooked pasta to the skillet with the shrimp and sauce. Throw everything together to combine.
- Garnish with chopped fresh parsley.
- Serve:
- Divide the spicy shrimp scampi among plates.
- Optionally, sprinkle grated Parmesan cheese over the top.
- Serve immediately with crusty bread or garlic bread for soaking up the delicious sauce.
Note: Enjoy Gabrielle’s Spicy Shrimp Scampi as a delectable and satisfying meal with a delightful kick of spice!
Now suppose you’re ready to bring the flavours of Desperate Housewives into your kitchen. In that case, you can snag a copy of the official cookbook, “Desperate Housewives Cookbook: Juicy Dishes and Saucy Bits.”
And guess what? You can find it on the virtual shelves of none other than Amazon. Click the link below, and you’ll be whisked to culinary heaven. Oh, and don’t forget to check the prices; you wouldn’t want to miss out on a great deal!
Click here to buy the Desperate Housewives Cookbook on Amazon!
So, my fellow food enthusiasts, grab your aprons, turn on some Desperate Housewives reruns, and let’s embark on a flavourful journey through the iconic recipes of Wisteria Lane.
Get ready to impress your friends and family with dishes as juicy as the housewives’ secrets. Happy cooking and bon appétit!